- Contact reports are useful within your CGA/NOC for administrators and Board Members and are not related to a team.
- This report would replace the usual Excel spreadsheet that CGAs/NOCs use to store information about key contacts.
- The advantage of creating a report is consistency. If you remember to update the information in Plus1%, then extracting a report ensures that the data is always up to date whereas an Excel sheet easily becomes out of date.
- Contact reports can be related to the person OR can be related to organisations (i.e. CGF, IOC, NFs). It will depend on the ‘Report Type’ that you select.
Learn how to create a ‘Contact’ report by following the screen steps below:
Starting a Contact Report

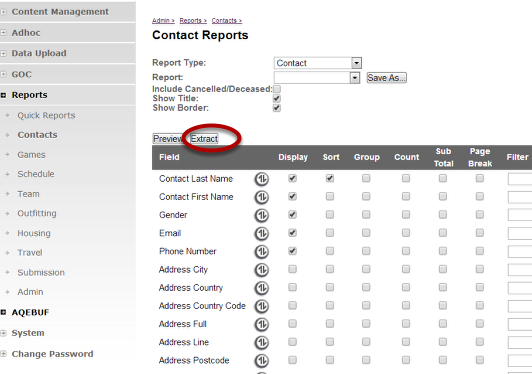
Click on top menu ‘Admin’.Click on side menu ‘Reports’, then ‘Contacts’. The above screen will appear.

Selected a Report Type from the dropdown box (Contact, Organisation or Contact Cross Tab).
You will now see all the possible fields that the report can contain. These all appear somewhere in Zeus as fields that can be populated.
Now that you see ALL the fields, you will be able to select which ones will be displayed in the report.
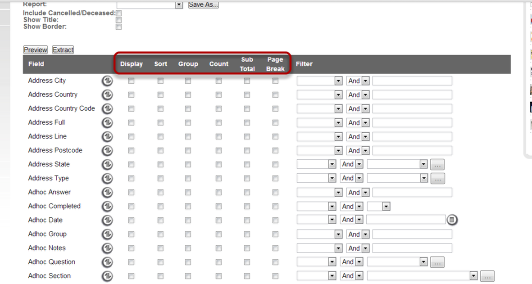
Before selection of fields, understand what each of the other features to ensure your report is as easy and precise as possible to read: Display: You must tick the display box in order for that field to simply show up in your report Sort: (Similar to Excel) Sorting data helps you quickly visualize and understand your data better, organize and find the data that you want (i.e. names in alphabetical order, numers (smallest to largest or largest to smallest etc.) Group: Grouping ties a range of like fields together (i.e. all persons within the same contact group) Count: Subtotal: Subtotal adds several data fields together to give a total Page Break:

Select the fields you would like to see in the report. In this example we are displaying the Contact First Name, Contact Last Name, Email, Gender and Phone Number. We are also SORTING the Contact Last Name which means it will display in alphabetical order.

In order for the fields to show up in a particular order, you must use the ‘double arrow’ icon . Click on it for a pop-up window to appear.
Once the window has appeared, use the arrows to change the order of the fields.
Once you have the order you want, click Save.
Previewing the Report

Once you click Save on pop-up window, let the page re-load.
The new order of fields will appear on the page.
If you would the title and a border to be seen in the preview for easier reading, be sure to tick those boxes.
You can now ‘Preview’ the report. This means it appears in a new Internet Window (but has not been downloaded).
In order to ‘Preview’,hold down ‘CTRL’ on your keyboard and click Preview at the same time.
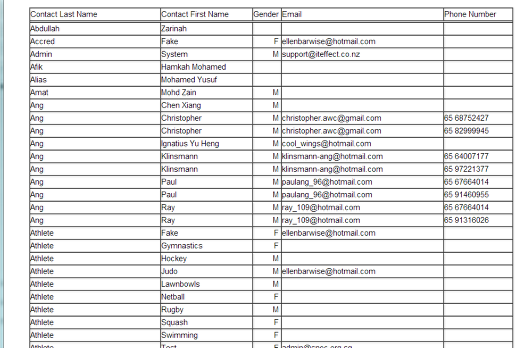
Now a preview of your report will appear.
Depending on what comes up, you may want to make changes to the fields displayed and/or group and sort them differently.
Extracting the Report
Once you are happy with the preview of the report, you are able to extract it. Extracting the report means you download it from Zeus, to Excel.
To extract the report hold down ‘CTRL’ and extract.

A pop-up window will appear asking what to do with the file.
Simply ‘Open’ it with Microsoft Office Excel.
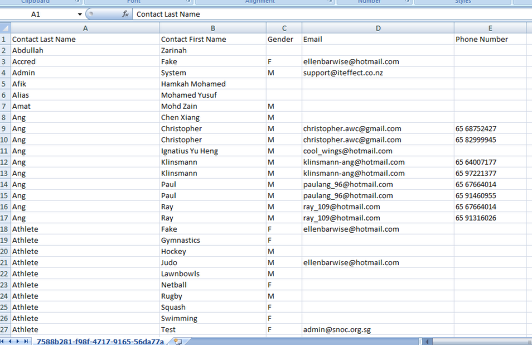
Your report will now appear in Excel as a downloaded .csv file.
